How Do I Measure My Head For A Wig? – 5 Easy Steps!
1. Why Do I Need the Right Cap Size?
Comfort, Confidence, and Styling Ease are just a few of the reasons you will want the right wig cap size. Getting the wrong cap size can result in headaches, the wig slipping back or forward on your forehead, and create insecurity in your wig wearing experience.
2. Let’s Break Down the Size Options
Would you look at this, a beautiful chart, because we believe in keeping things simple. This shows you the standard measurements for most brands. Below, we will break down a few specifics and touch on some Pro Tips to consider when choosing a brand.
Head Size
Around the Head
Front to Back
Ear to Ear
Ultra-Petite/Child
19”
12”
12”
Petite
21”
13.25”
13”
Petite/Average
21.25”
13.75”
13.25”
Average
21.5”
14.25”
13.5”
Average/Large
22.5”
14.75”
13.75”
Large
23”
15.25”
14”
3. But… How Do I Measure My Head?
Alright, now you are probably asking what that chart actually means. You’re in luck! We also created a short video to assist in the process.
If you find yourself falling between two measurements, go with the larger size. The front of the wig cap should be worn where your natural hairline would start, and then use the ear tabs inside the cap to finish lining it up.
4. Pro Tip - The Inside Scoop on the Manufacturers and Fit
Average wig caps are the most common option in a manufacturer’s repertoire. Until very recently, that is, we have seen them expanding their styles for Petite and Large cap sizes! This is a game changer, and though you may still have fewer options being in a petite or large cap size, the horizon is getting brighter by the day.
Above, we gave a chart for the standard measurements of wig cap sizes. But, just as the credit card readers vary from store to store... well, wig caps do the same amongst the different manufacturers. So, we talked amongst our wig experts, took into account your wonderful reviews, and made a nice little breakdown of each manufacturer we carry and their typical average cap fit tendencies.
Brand Average Snapshot
Tight Average
True Average
Roomy Average
Amore
Belle Tress
Gabor
Ellen Wille
EasiHair
Hairdo
Fair Fashion
Envy
Henry Margu
Noriko
Estetica
Mane Attraction
Orchid
HIM
Rene of Paris
Jon Renau
Raquel Welch
Tony of Beverly
TressAllure
5. Have the Right Fit, but Still Looking for Extra Security?
That is really all you need to know about getting the right fit! As you continue on your wig wearing journey, please feel free to reach out to us with any thoughts or questions. Stay Beautiful inside and out! -NBW Family
- Fiber Love Shampoo: 8.5 oz - Conditioning Spray: 8.5 oz - HD Smooth Detangler: 8.5 oz - Wide Tooth Comb
Scented
PRODUCT FOR SYNTHETIC HAIR WIGS
ACCESSORIES ARE NON-RETURNABLE
Wig Care Guides
Wash Your Synthetic Wig
Let’s talk wig care! You have been wearing your absolute favorite style… you know, the one you wear to the dentist, the doctors, your date night out, and pretty much everywhere! You start to notice it doesn’t have quite as much bounce and vibrancy as it did when you first took it out of the box. I’m guessing, and correct me if I am wrong, there is a chance you haven’t washed it in a while. No worries, this is bound to happen with the wig you love and don’t want to put down. But now the question is, where do you start?
Thankfully, washing your wig is a pretty easy process that will leave it looking instantly refreshed and back in action in no time. If you have never washed your wig before, the first couple of times through the process might feel a little intimidating, but that is why we are here: to make the process as easy as possible. Your favorite wig is an investment, and one you want to not only take care of, but more importantly, not ruin. Fortunately, we have done our research and come up with our best tips for washing your wig.
To begin, gather the supplies you are going to need.
An open and clean sink that you can easily work around.
A wide tooth comb.
Shampoo and conditioner specifically formulated for the specific hair fiber you are washing.
A soft, clean towel
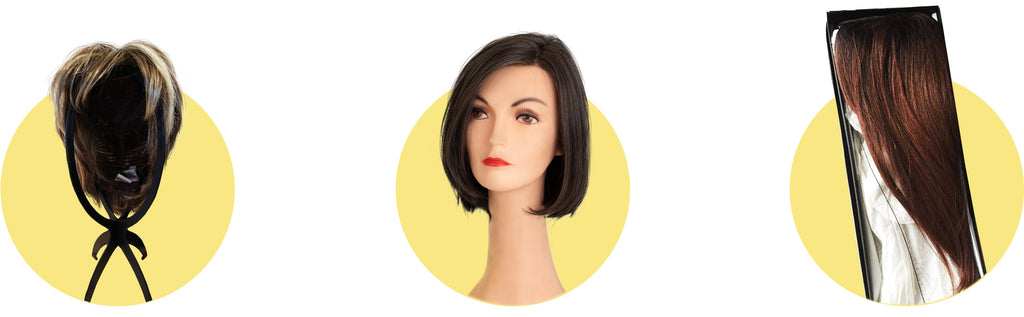
Wig stand
The essential basics of taking care of your wig
First, let’s break down the basics. We suggest washing your wig around every six to ten wears, depending on your lifestyle. Some people decide they can wait longer to wash their wig, while others find they need it washed sooner. Lifestyle plays a role because if you tend to use more product on your wig, it creates build-up after a while. If you are the active type, then workout routines may result in some sweat building up in the cap of your wig. For synthetic wigs, a good wash will not only clean the inside of the cap but will also refresh the built-in style or hair pattern.
1. Prep Your Wig
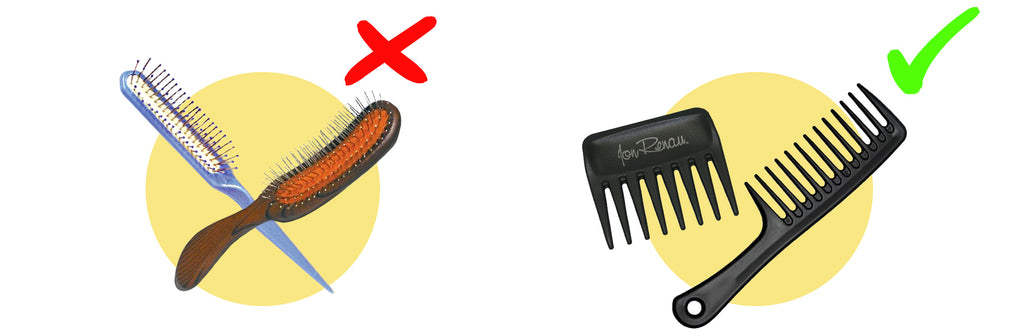
Before starting the washing process, gently brush through your wig to remove any tangles or knots. A wide tooth comb, just like this one (Jon Renau - Wide Tooth Comb), is a favorite of ours for brushing all different hair types and textures. Using the correct comb for your piece can be essential to keeping the fibers safe. A wide tooth comb is a great option for most styles!
2. Rinse Your Wig
Place your hand inside the cap, holding the wig at the top. Turn the temperature of the water to lukewarm or cool (make sure it is not too hot) and run it over the entire wig, including the cap and all the hair. You can use your favorite shampoo formulated for synthetic hair. If you do not have one, take a look at some of our customer-approved Name Brand favorites:
Once the hair is wet, pour about a quarter-sized amount of shampoo into your hand to begin. Then slowly lather through the hair, only adding more shampoo as needed. Make sure the hair stays traveling in the same direction. You will also want to avoid excessive rubbing as this can be hard on the fiber and lead to tangling. Once the hair is well shampooed, begin to rinse with lukewarm to cool water. As soon as the water runs clean, and you don't see any suds or leftover soap residue in the hair, you can begin the next step.
4. Condition Your Wig
While the wig is still wet, apply conditioner. Conditioner is important because it protects your wigs fibers. Here at Name Brand Wigs/Joshua24, there are two different types of conditioner that you could use. The first is a squeeze-bottle conditioner that you would apply to the wig just as you did with the shampoo. The second option would be a leave-in conditioner, which many brands have started to provide.
If you choose the squeeze-bottle conditioner, take a small amount and gently run it through the hair, focusing on the bottom three-quarters of the wig. Make sure to keep the conditioner away from the roots and very top of the wig cap because it can loosen the knotting after a while. Rinse the conditioner out with lukewarm water.
If you choose the leave-in conditioner, first gently dry the hair with a towel so that it is still damp and not excessively dripping with water. Spritz the hair with a few pumps of conditioner and again, gently being the key word, use your fingertips to ensure it is well distributed. Even with this leave-in conditioner, focus on the ends of the hair to about halfway up the hair for longer styles. Remember to be especially careful not to get too much conditioner on the cap when it comes to lace or monofilament tops. Because the conditioner is meant to detangle, it will do just that and eventually loosen the hand tied knots on the cap, causing strands to fall out. You do not have to worry about this as much with a traditional cap.
Here are some well loved synthetic fiber conditioners:
After washing and conditioning your wig (I bet she is smelling pretty fresh right now), wrap the hair in a towel to pat off any excess water (do not rub the hair). Now place it on a wig stand and allow it to naturally air dry. If you have a very curly style, you can prop a book up underneath the curls to keep them from stretching and losing their form. This will take some tension off the curls as they dry.
6. The Finishing Touch
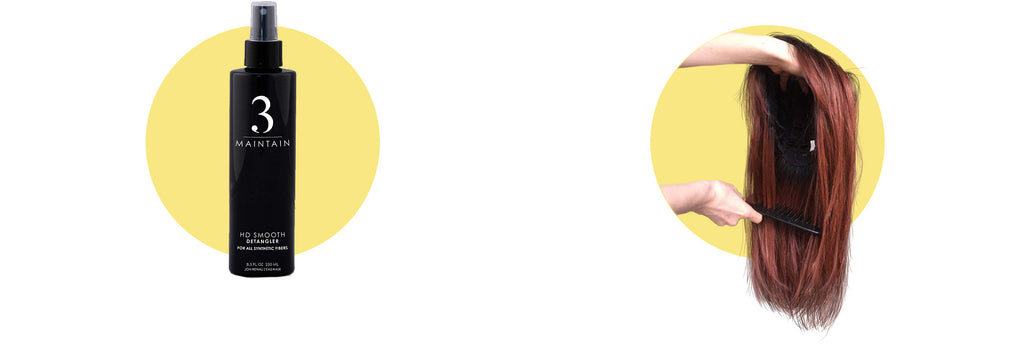
You are almost there, but we have one more helpful tip for you! Once the hair is dry, apply the HD Smooth Detangling Spray to your wig. This allows for extra protection while keeping those fibers tame. This is highly recommended for heat friendly and mid to longer styles. When spraying it on, focus on the bottom of half of the hairpiece. We suggest using your fingertips or a wide tooth comb to evenly distribute it throughout your style. And there you go, you have made it! Your piece is fresh, vibrant, and ready for days of wear!
Final Thoughts
Let’s recap a couple of our most helpful tips:
Keep in mind when conditioning, avoid the very top of your monofilament or lace front wigs. Conditioner is meant to detangle and loosen the hand knotting, which can cause strands to eventually shed from your lace front or monofilament.
Another thing to avoid is brushing the hairpiece when it is still wet. This will stretch the fiber when it is in a compromised state.
Always use shampoo and conditioner made specifically for synthetic wigs. This will keep your hairpiece looking its best. Regular shampoos and conditioners have added sulfates, chemicals, and dyes that can damage synthetic and processed human hair. To ensure you get the intended lifespan out of your style, use the correct products for that hair type.
Lastly, no setting is necessary after washing the piece; curls will snap back into position when the hairpiece is completely dry. Make sure to store hair similar to the way it will be worn.
Thanks for joining us on our wig-washing journey! We hope these tips bring your hair all the love it needs and keep you feeling amazing! Feel free to share this article with a friend in need 💝 Contact us with any questions.
Good Day! Welcome back to Name Brand Wigs and our “How To” Articles.
Today, we are going in-depth on the best tips and steps for washing your Human Hair Wig, along with some tidbits of info you may not know!
What Is A Human Hair Wig?
Human Hair Wigs are definitely specialty items worth the investment. They are made from real human hair and are known for their beautiful, natural look.
Behind the Scenes: Typically, human hair is collected from Indonesia or China, and then it goes through an extensive process of being constructed and sewn into the wig you will eventually wear and adore. The process and love that goes into making a human hair wig ensure the quality of the piece that you receive. This also means that a human hair wig will have a higher price point, but many would say it is well worth it due to the longevity and natural quality of the hair.
Quality and versatility are the first two aspects you can count on with a human hair wig. With human hair, you can cut, have professionally colored, or even style with heat, and all while enjoying the longevity human hair provides. For instance, a typical synthetic wig lasts anywhere from 2 to 4 months. Human Hair wigs can last anywhere from 4 to 6+ months, depending on the care process and the natural environment you are in.
The look and feel of human hair is undeniably very natural and gorgeous! Human hair has a grace and flow that makes you feel like you are on top of the world.
Part of the durability of your human hair wig is how you care for your wig and the washing method used. We want to help you love your hair for as long as possible, so take a look at these 7 easy steps you will need for washing your Human Hair Wig.
1. Detangle Your Wig
The first step is to prepare your wig by detangling any knots that may have built up through everyday wear. The best type of comb to use for this process is a Wide Tooth comb to ensure gentleness with the fibers. Start combing from the tip of the wig and upwards towards the top, carefully removing all the knots.
2. Wet Your Wig Down
One of our best tips is to keep the water lukewarm, edging on cold. This will help preserve the fibers. Run the wig under the faucet to wet it down. Run the water in the direction of the hair, from the crown to the tip. Again, the purpose is to be gentle with the fiber and to run the water in the direction of the hair to create less friction in the fibers.
3. Shampoo Your Wig
Choose a shampoo made for Human Hair Wigs. Take a quarter-size amount of shampoo and work it through the hair in a downward motion. Gently massage shampoo into the cap and ear tabs. (Note: if this is a hand tied cap, then you will want to be extra gentle.)
4. Rinse Out Shampoo
Rinse the shampoo out with lukewarm/cool water, running the water in the direction of the hair, from crown to tip. Squeeze out the excess water, but do not wring the hair out.
5. Condition Your Wig
Choose a conditioner made for human hair wigs. Take a small amount and work through the hair. Focus mostly on the tips and mid-section of the wig
Pro Tip: It is best to keep the conditioner away from the top of the cap, especially with any knotting in a lace-front, monofilament top, or hand-tied cap. The conditioner can easily loosen the knotting and cause the hair to fall out.
Deep condition your style every 3-5 washes. This means you will leave the conditioner on the style for about 20 minutes. If you really want to treat the hair, you can leave the conditioner in overnight.
6. Rinse Conditioner Out
Thoroughly rinse your wig with cool water. Running the water in the direction of the hair.
7. Towel Dry Your Wig
Gently squeeze the water out of the wig and lay the wig on a towel. Fold the towel over the wig and pat dry any excess water. (Never wring the hair out.)
8. Blow Dry Your Human Hair Wig
It is always recommended that you blow-dry your human hair wig. Why? It helps preserve the fiber and keeps the frizz to a minimum.
Pro Tip: Gently pin your wig to a canvas block head to help with the blow-drying process. You will find it is a lot easier to work with the hair!
First, take a wide tooth comb and gently remove the knots from your damp human hair wig. Then we suggest using a type of heat treatment spray or blow-dry balm. We typically use the Jon Renau Blown Away Blow Dry Balm for human hair.
To use the Jon Renau Blow Dry Balm, you will want to take a small amount and run it through the ends and mid-section of the hair. Again, be careful not get any balm near the knotting of the cap.
When blow-drying, use medium to medium-high heat. Starting at the nape, section hair off in 2-inch pieces and use a round boar bristle brush to blow-dry your wig. Using a bristle brush at this point will help you add volume to your style and also mold how you want the hair to fall.
Why can’t I use regular products on my Human Hair Wig?
This is a common question, and it is a great one. Human Wig Fiber is slightly different from bio hair due to the manufacturing process the hair goes through. Part of this process consists of collecting the hair and then coloring or stripping color from the hair before it is made into a wig. This is why you will want to take special care of your human hair wig and only use products specifically for human hair wigs.
Love your hair and ensure its longevity!
Other Considerations
Do I Have to Re-Style My Human Hair Wig After Every Wash?
Human hair is great because of the durability and natural look it provides, but the answer to this question is: “Yes.” One aspect to keep in mind when switching from your synthetic heat friendly wig to your human hair wig is that a human hair piece will need to be restyled after every wash. Just like bio hair, the curl will not stay in a human hair style after you wash it.
Want to Style Your Human Hair Further?
To protect the fiber of your human hair wig, use a heat treat spray before using a flat iron or curling iron on your wig. We use the Jon Renau Heat Treat Thermal Spray made for human hair wigs on our styles. Spritz a little on your wig, and you are ready to style away!
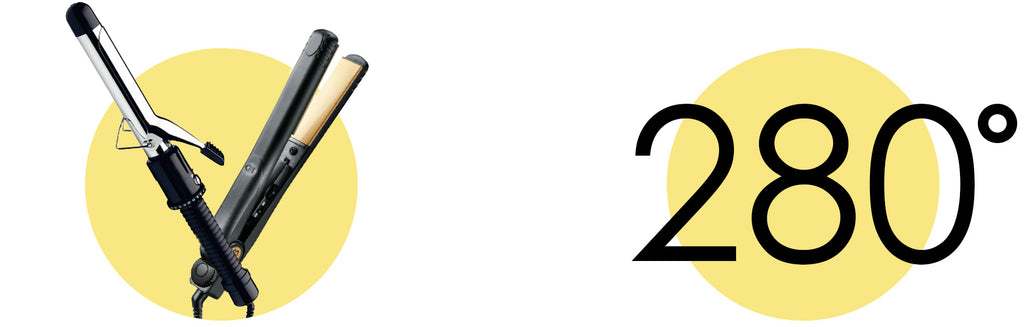
What Temperature of Heat Can I Use When Styling My Human Hair Wig?
Human hair can handle a fair amount of heat, but just like bio hair, using a high level of heat will be harsh on the fiber. We recommend using heat around 280 degrees.
Final Thoughts
We hope this article was helpful and inspires you to love your human hair wig! Human hair wigs are gorgeous, and the versatility they offer is unmatched. Love your hair and ensure its longevity!
Let us know if you have any questions, comments, or want to share the love with us. We are always here to help and support you in your hair journey! -NBW Family
Congratulations! Heat Friendly hairpieces can be a wonderful investment and a great way to customize your style. Having a heat friendly style can also provide a unique and different journey than your other synthetic pieces. This guide will go through the basics of taking care of your heat friendly piece.
How to Care for your Heat Friendly Hair
How to correctly care for your heat friendly hair might be the most important key to its longevity. If you follow these directions and tips, it should be smooth sailing from here!
Make sure to use a wide tooth comb. Wire brushes strip heat friendly fibers of their properties, making them deteriorate faster than normal, and they become more susceptible to damage. Using a brush also pulls the fiber down, and when it springs up, it frizzes and tangles with fibers around it. Instead, use a wide tooth comb! These are much safer for regular synthetics as well.
It is very important to be gentle. Heat friendly fibers are prone to tangling and don't react to friction well. To help with that, try to limit the friction on your style. For example, try using your fingers to brush and manipulate, versus a comb, all the time.
Due to the delicate nature of this fiber, it is important to check it after every wear to prevent tangling and frizzing. The nape and any place that touches your body or clothing is the most vulnerable to friction and thus, tangling. If you notice tangling, tend to it right away. Mist 3-5 pumps around the wig, or directly target the affected area with Jon Renau’s HD Smooth Detangler. Focus on the ends and nape, and stay away from any hand tied portions of the cap. Conditioners and detanglers loosen knots and cause hair loss in any hand tied areas. Use a wide tooth comb to remove any tangles, starting at the ends and working your way up to the base of the cap.
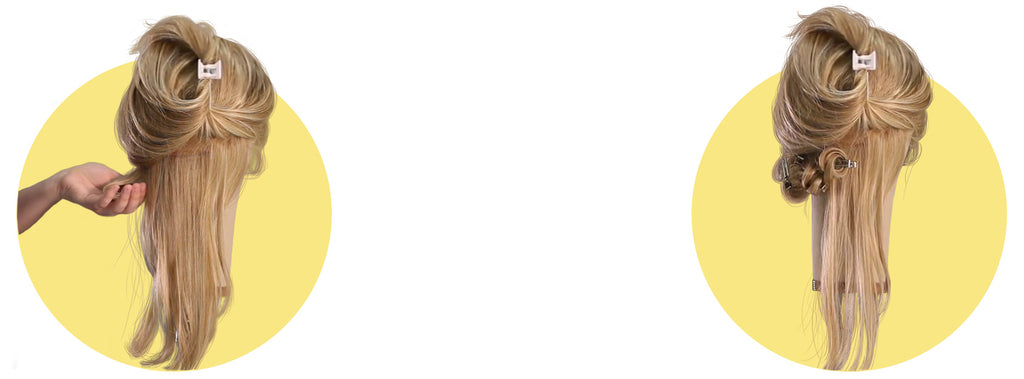
Try an updo! With long wigs, be creative with your styling every once in a while to limit the friction of the wig against your clothing and neck. This will help minimize the frizzing. For example, braid long hair, put it into a low ponytail, or a nice low bun to minimize the movement on your neck and back.
Lastly, we recommend storing your wigs on a stand, a mannequin head, or, if need be, in the original box. Ideally, your wig will be stored with the hair fibers falling naturally, and not being tousled, tangled, or rubbed frequently.
How to Wash your Heat Friendly Hair
We recommend washing your piece every six to ten wears. While washing the style helps clean the wig and revive some of the curls and pattern, heat friendly fibers tend to be more susceptible to friction and frizzing during the process. Limiting the times you wash your wig will improve its longevity.
As said earlier, avoid conditioner on your monofilaments or lace fronts. Conditioner detangles and loosens the hand knotting, which can cause strands to shed from your lace front or monofilament.
Another thing to avoid is brushing the hairpiece when it is still wet. This will stretch the fiber when it is in a compromised state.
Use shampoo and conditioner made specifically for synthetic wigs. This will keep your hairpiece looking its best. Regular shampoos and conditioners have added sulfates, chemicals, and dyes that can damage synthetic and processed human hair. If you want to ensure that you’re getting the intended lifespan out of your style, make sure to use the correct products for that hair type.
Lastly, no setting is necessary after washing the piece; curls will snap back into position when the hairpiece is completely dry. Make sure to store hair similar to the way the piece is worn.
How to Style your Heat Friendly Hair
Heat Friendly products can withstand a low amount of heat from styling tools. Always be aware of your styling tool's settings. Heat temperatures vary by brand, but to be safe, stay below 280 degrees Fahrenheit if you are unsure.
Before you dive into restyling your heat friendly wig, keep in mind it is extremely difficult to get the original style back. Once you alter the style with heat, it will stay in that style; even if you wash it, it will stay in the style it was heat baked to.
Something to keep in mind is that heat styling your heat friendly wig will take longer than styling normal bio hair. When curling the hair, it is recommended to hold the curl in place until the fiber cools. If you let it go right away, the curl will cool in a flat position.
As stated earlier, make sure to only use products specifically suited to synthetic hair fiber. We highly suggest using Jon Renau's Heat Defiant Smooth Detangler anytime you are wearing a heat friendly piece. We also recommend using a heat protectant when using heat to style your piece. This will prevent frizzing and will help your ends stay looking their best!
Below we have a video that breaks down products we recommend and the process for using heating tools on your heat friendly hair. The video goes through straightening the hair and curling it.
The lace front is a nearly invisible mesh-like material that lies across your hairline. Lace fronts provide a natural and seamless look. Each hair is sewn into the mesh, providing a skin-like appearance at the hairline. This feature is well-loved, and many manufacturers now offer a lace front on their wigs.
2. Benefits of a Lace Front Wig?
Lace front wigs offer the most natural hairline, which helps you confidently wear your style off-the-face or with face-framing layers. Many of our wigs have ready-to-wear lace fronts. This means that the lace is measured and cut to the perfect length, so you don’t have to cut it yourself!
Whether you suffer from hair loss due to chemotherapy, premature balding, alopecia, hair thinning, or if you are looking to switch up your hairstyle, a lace front can help you feel comfortable in your wig.
How to Care for a Lace Front Wig
Taking care of your lace front will help the longevity of your wig and maintain its natural look. Lace fronts are made with a gentle lace mesh that should be treated delicately.
3. Helpful Don'ts:
Never pull on your lace front. If you pull on the lace front, it will stretch the lace out and create gapping at your forehead. Pulling at the lace front could also begin to wear away at the lace mesh to the point of fraying. A better option when adjusting your wig is to use the ear tabs to move the wig for a more comfortable fit.
Never condition the lace front (or on any knotting in a wig cap). Conditioner detangles and loosens the hand-knotting. This can eventually cause strands to shed from your lace front, and you will notice hair loss.
When brushing and washing your hair, remember to be gentle around the lace front. It is okay if you get some soap on the lace front, especially if you are trying to wash off some makeup!
4. Finding Some Lace Front Discomfort?
There are a couple of things you can do to ensure your lace front is working for you. The first is to ensure you have the right wig cap size. A wig cap that is too large or too small can cause discomfort because it then rubs against your forehead. Check out our video on how to properly measure for the right cap fit:
5. Secure Your Lace Front Down
Sometimes you may want extra security with your lace front. There are several great ways to ensure your lace front is staying put! A couple of tricks of the trade are to use either glue or tape to fasten it down. This can also help with lace front discomfort and prevent that friction on your forehead.
Lace Front Tape: Easy to use, this double-sided sticky tape comes in a roll that can be cut to the desired length. When using tape, you can stick it directly onto your forehead or the lace front itself.
Adhesive: “It Stays” by Jon Renau is a gentle roll-on adhesive that washes off with water. This product provides a nice, secure hold while being easily removed.
Pro Tip: Applying a small amount of baby powder or dry shampoo to your forehead, underneath the lace front, can help prevent irritation from the lace.
Makeup, such as foundation or powder, can help the lace front blend with your skin tone. This also gives your front hairline a softer finish.
If you would like to cut your lace front further, or cut a section that has started to fray, always use a Pinking Shear to do so.
The lace front keeps advancing. If you still find that you don’t prefer this feature, then we would suggest taking a look at monofilament or hand-tied wigs without a lace front.
Final Thoughts
There you have some of the best tips and information on lace fronts! Consider yourself a pro, but even pros have questions. If you need a little extra help, contact our customer service team. We are always ready and willing to help! - NBW Family
Shop our Lace Front Wig Collection (If you need to narrow your search options, use the selection menu on the left to choose style specifics!)